

Looking to build a Wintelligent® walk in cooler or freezer? You're in the right place.
This guide for building a Wintelligent® with a floor will show you how to do that.
Building a Wintelligent with NO FLOOR? Click here.
Before you grab your block wrench and get started, it's important you learn how to locate your assembly drawing, handle your panels correctly, and prepare your site.
Sounds like a lot? Don't worry. The video and step-by-step instructions below will show you how to build a Wintelligent® walk in cooler or freezer in no time.
→ Download Now: The Ultimate Guide to Buying a Walk in Cooler in 2023 [Printable PDF]
One important disclaimer before we dive in...
All electrical and refrigeration work should be completed by a licensed and insured electrician and commercial refrigeration contractor.
Alright, let's get started.
The process of building a Wintelligent® with a floor is broken down into 5 parts:
- Inspecting and Handling Your Wintelligent® Panels
- Preparing Your Site
- Assembling Your Wintelligent® Floor Panels
- Assembling Your Wintelligent® Wall, Door & Ceiling Panels
- Finishing Post-Assembly
Inspecting and Handling Your Wintelligent® Panels
Take time to inspect the parts and equipment included in your shipment. Make sure the order number on the boxes and panels match the order number on your invoice.
If you discover damaged parts or equipment, take photos and make a note of the damage on your delivery ticket. Contact your point of sale for further instructions.
Each panel is individually labeled:
Corner wall panel codes begin with "CWF".
Wall panel codes begin with "WF".
Floor panel codes begin with "F".
Ceiling panel codes begin with "C".
Door panel codes begin with "DR".
The assembly drawing included with your shipment, generally found inside the door package, demonstrates your panel layout and shows where each panel goes. This drawing will serve as a reference throughout the assembly process. Keep it handy.
When handling panels, keep them flat and avoid resting them on the edges of the corners to minimize the possibility of damaging them. Stack the panels on an elevated platform if the ground is wet and cover them with waterproof sheathing if you will be storing them outside.
Use 2 to 3 persons during assembly to avoid mishandling your panels.
Here is a list of the tools and accessories you will need to complete assembly:
- Block wrench (included) or power drill (block drill bit included)
- Vinyl caps for lock holes (included)
- Sanitary profiles (included)
- Level (not included)
- Right angle square (not included)
- Measuring tape (not included)
- Rubber mallet (not included)
- Hammer (not included)
- Ladder (not included)
- Chalk line (optional - not included)
Preparing Your Site
Site preparation is key to properly building your Wintelligent® walk in cooler or freezer. Make sure the floor space allotted for your box is level and swept clean of dirt and debris.
An uneven floor could result in a faulty assembly with doors and panels not sealing properly. If your floor is not level, you will need to use shims to make it level.
If you are building your cooler inside, adjacent to a wall, leave 3 to 5 inches of space on all sides of your cooler to allow for proper ventilation and at least 6 inches between the refrigeration unit and the ceiling if you opted for an indoor refrigeration unit.
Optional Pro Tips:
💡 Using the assembly drawing as a reference, measure and mark where the panels will go by outlining the perimeter of your walk in cooler or freezer with a chalk line. Use a right angle square or measure diagonally in both directions to ensure the measurements match and all corners are at a 90° angle.
💡 We recommend placing polyethylene sheeting on your existing floor underneath your box's floor panels to serve as a vapor barrier and keep ground moisture at bay.
Assembling Your Wintelligent® Floor Panels
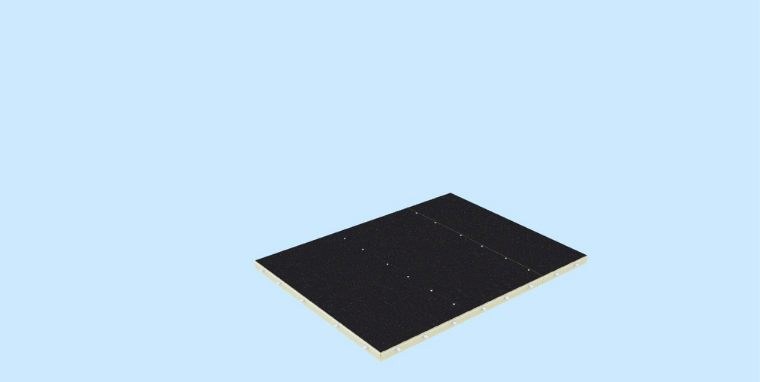
Step 1: Lay the floor panel end section down in the rear of your box as per your assembly drawing. Make sure the panel is level throughout.

Step 2: Attach the next floor panel as per your assembly drawing. Make sure the edges are flush and the floor panels remain level before fastening the floor panel locks using a block wrench or power drill.
💡 Listen for a "clack" sound when attaching floor panels to each other. This sound confirms panels are evenly attached. The locks will not fasten if the panels are not attached evenly.

Step 3: Continue assembling floor panels as per your assembly drawing until the last floor panel is in place. The last floor panel must be an end section.
Assembling Your Wintelligent® Wall, Ceiling & Door Panels
Save valuable time by reviewing the following "pro tips" before assembling your Wintelligent® wall, ceiling, and door panels:
💡 When attaching wall panels to each other, engage the anchored wall and floor panels simultaneously in one swift motion.
💡 Listen for a "clack" sound when attaching panels to each other. This sound confirms panels are evenly attached. The locks will not fasten if the panels are not even.
💡 Use two persons when handling and assembling the door panel to avoid mishandling it. Do not remove the door from the door jamb. Keep the door closed and locked until full assembly is complete.
Start assembling your Wintelligent® wall panels in the rear corner closest to a building wall.
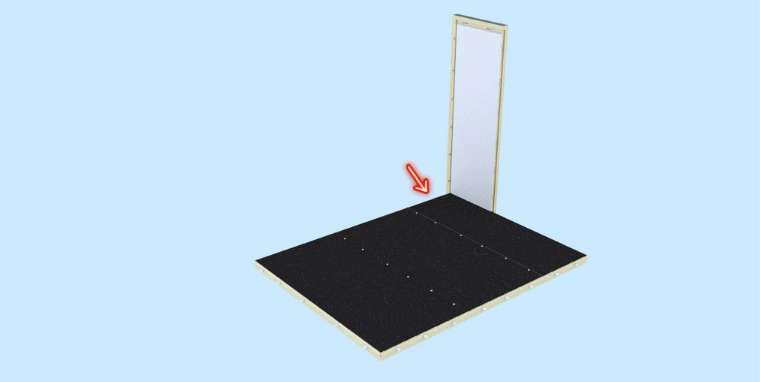
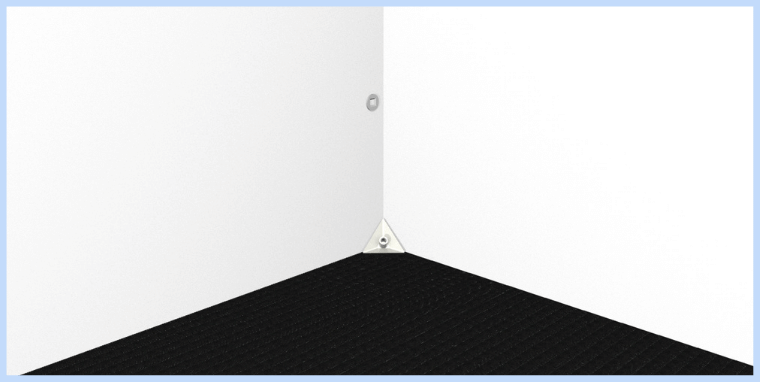
Step 1: Attach the rear corner wall panel (CWF1 or CWF3 on your assembly drawing) to the floor panel. Do not fasten the corner panel to the floor panel at this time.
Note: The placement of the rear corner wall panel for your specific cooler or freezer may differ from the rendering below. Your assembly drawing may show the rear corner wall panel goes where the red arrow points.
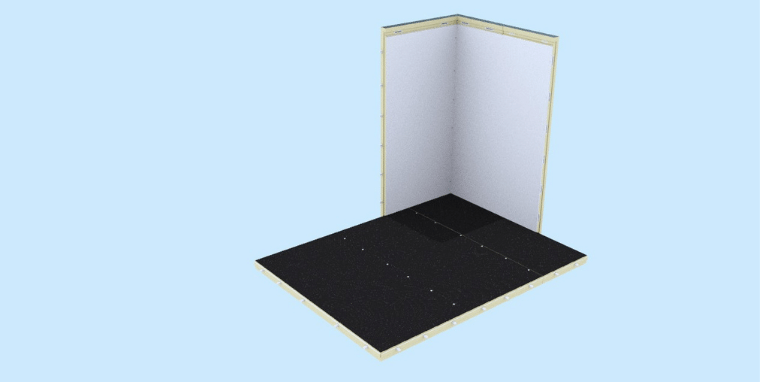
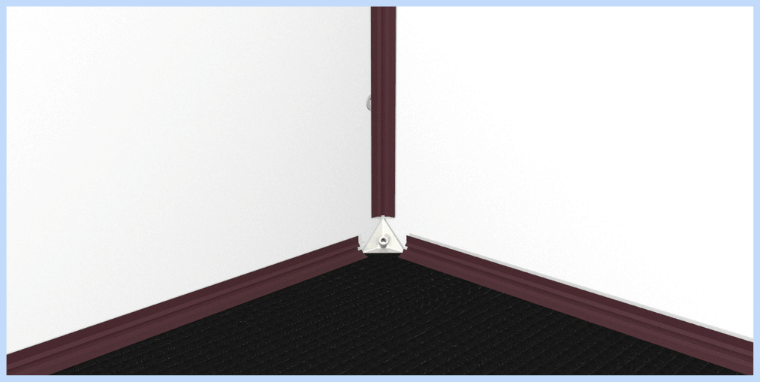
Step 2:Attach the wall panel adjacent and perpendicular to the rear corner panel (WF15, WF30 or WF45 on your assembly drawing).
1. Fasten the wall panels to each other.
2. Fasten both wall panels to the floor panel.
Your box should look similar to this:
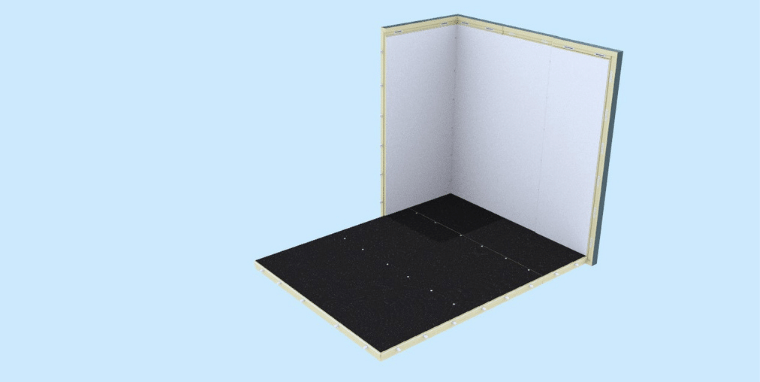
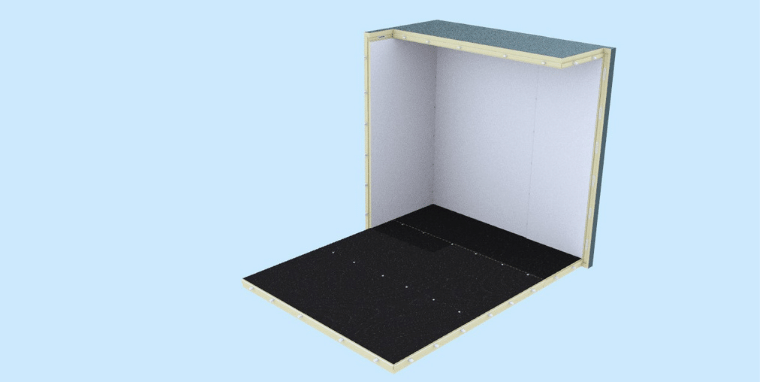
Step 3: Continue assembling wall panels in the direction of the other rear corner to form the shape of an "L" as per your assembly drawing and the renderings below. This provides stability as you build your box.
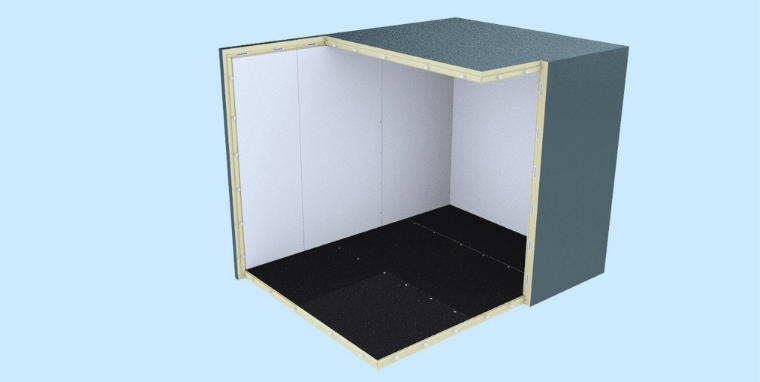
Step 4: Assemble your first ceiling panel by attaching the rear ceiling panel to the wall panels as per your assembly drawing and the rendering below. Fasten the ceiling panel to the wall panels.
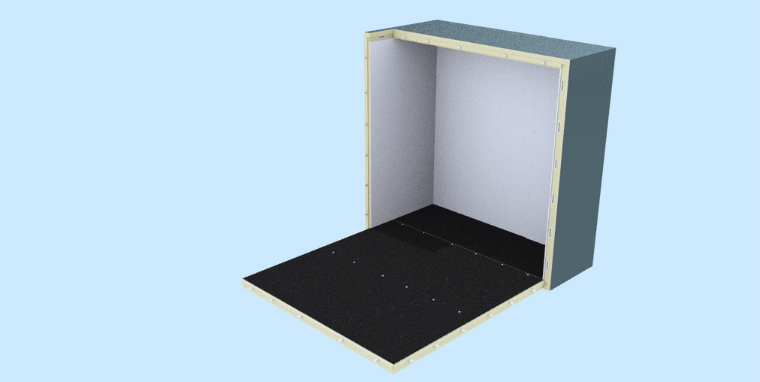
Step 5: Attach the wall panel serving as an end cap to the ceiling panel (WF or CWF on your assembly drawing) to the wall, ceiling, and floor panels.
1. Fasten the wall panel to the adjacent wall panel.
2. Fasten the wall panel to the ceiling panel.
3. Fasten the wall panel to the floor panel.
Your box should look similar to this:
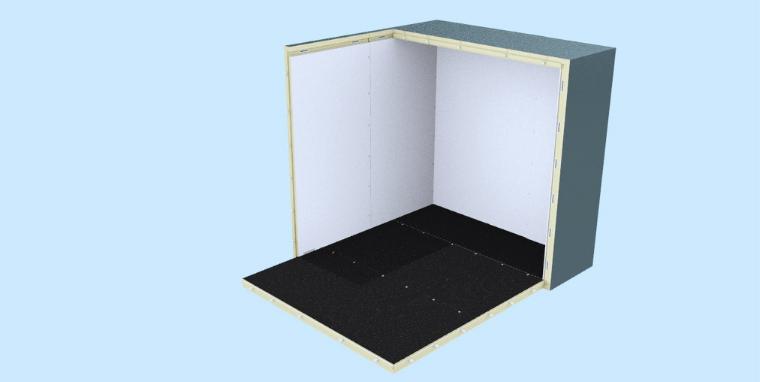
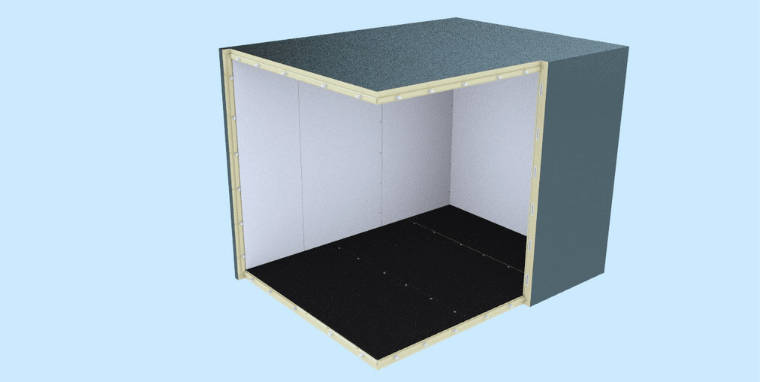
Step 6: Continue assembling wall panel(s) on one side of the box as per your assembly drawing.
1. Fasten the wall panels to each other.
2. Fasten the wall panels to the floor panel.
Your box should look similar to this:
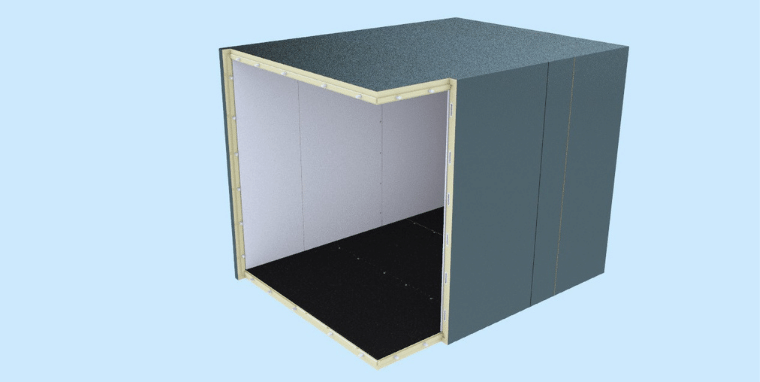
Step 7: Attach the next ceiling panel (as per your assembly drawing) to the rear ceiling panel and the wall panel(s) you assembled in the previous step.
1. Fasten the ceiling panels to each other.
2. Fasten the ceiling panel to the wall panels.
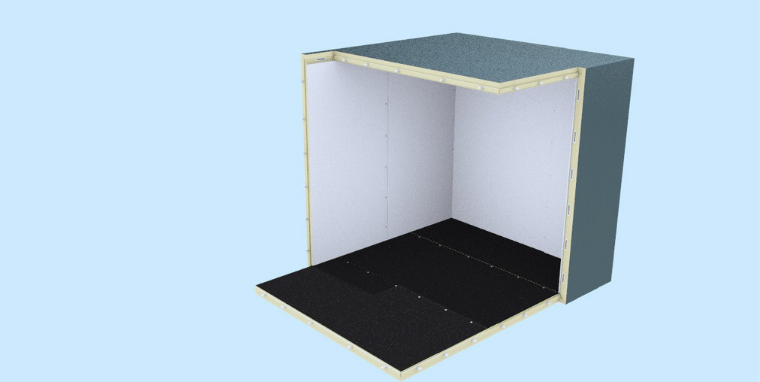
Step 8: Continue working your way to the front of the box by assembling wall panels (on each side of the box) and ceiling panels as per your assembly drawing and the renderings below.
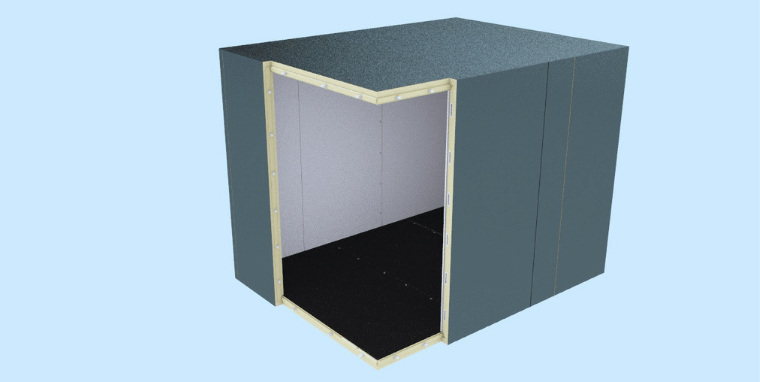
Step 9: Attach and fasten the door header panel to the door frame panel.
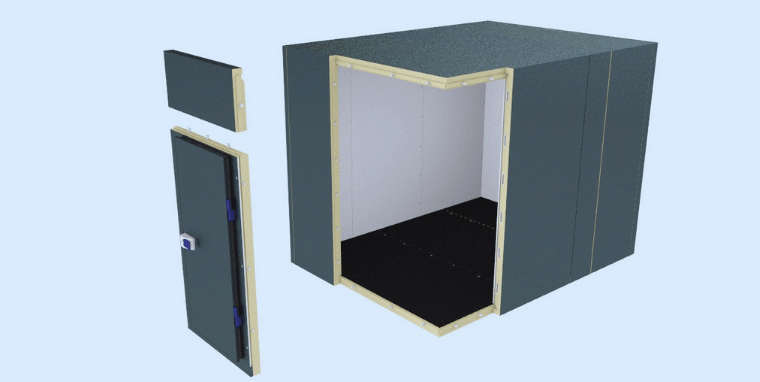
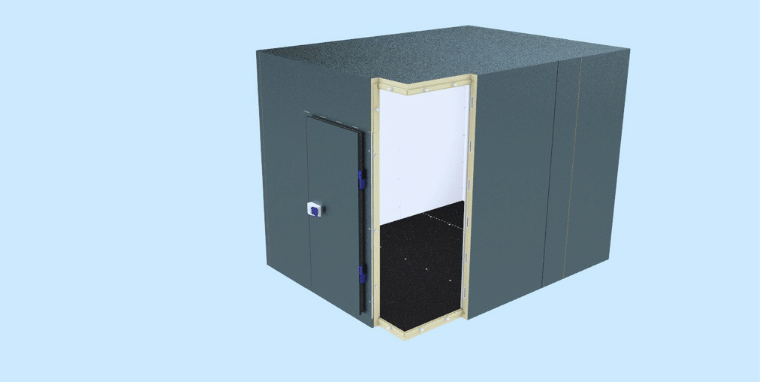
Step 10: Attach the fully-assembled door panel to the wall, floor, and ceiling panels as per your assembly drawing.
1. Fasten the door panel to the wall panel.
2. Fasten the door panel to the ceiling panel.
3. Fasten the door panel to the floor panel.
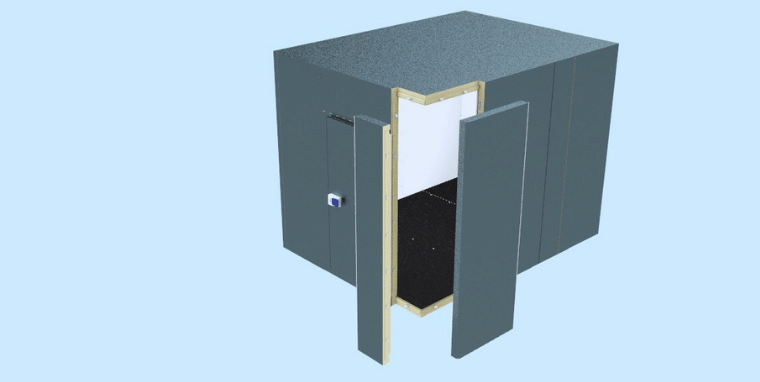
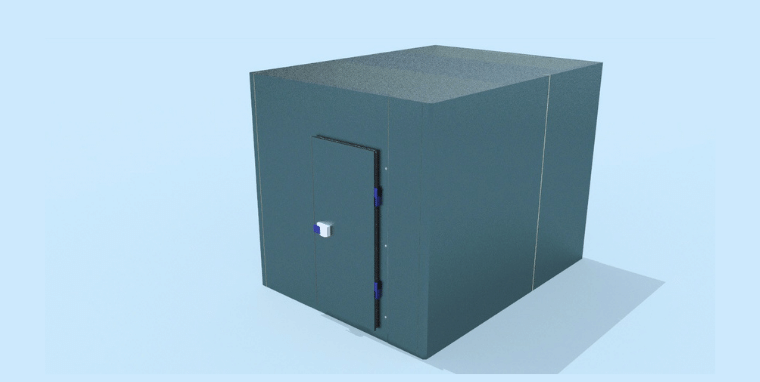
Step 11: Continue assembling wall panels as per your assembly drawing. The last wall panel assembled should be a corner wall panel (CWF1 or CWF3).
Your assembled Wintelligent® walk in cooler or freezer should look similar to this:
Finishing Post-Assembly
Step 12: Remove the protective vinyl coating from all panels.
Step 13: Insert the protective vinyl caps in the panel lock holes.
Step 14: Insert the sanitary profiles in all interior corners and throughout the perimeter of the floor. No sanitary profiles are necessary for the ceiling joins.
💡 You may have to cut the black seam tracks and white sanitary profiles to size prior to installing them.
1. Start by screwing the white corner bases into the four corners of the perimeter of the floor. The screws are included with the bases.
2. Install the black seam tracks by screwing the tracks into the perimeter of the floor and the corner seams of your box. The screws are included with the tracks.
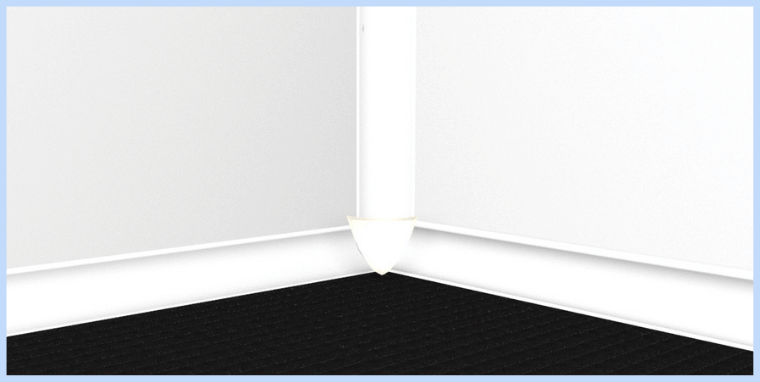
3. Snap the white sanitary profiles into the black seam tracks.
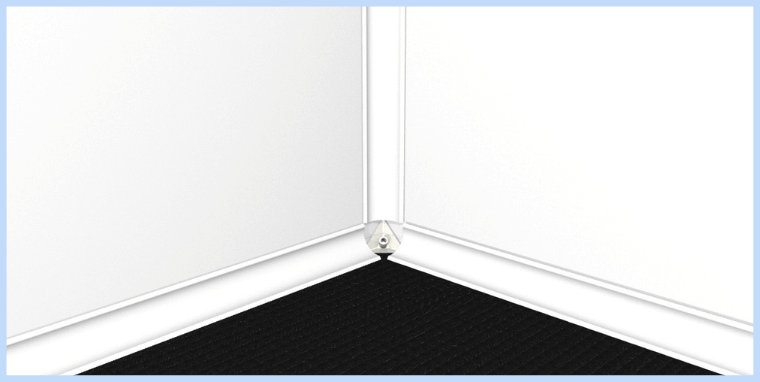
4. Plug the corner base covers into place.
Congratulations! Your Wintelligent® walk in cooler or freezer assembly is now complete. Please contact us at (800) 327-3371 or adrian@mrwinterinc.com if you have any questions.
.png?width=760&height=292&name=Footer%20Image_How%20to%20Buy%20a%20Walk-in%20Cooler%20in%202023%20(1).png)
Next you'll need a licensed and insured refrigeration contractor to connect your refrigeration unit now that your cooler is assembled.
Learn how to find a reputable refrigeration contractor who can help solve problems, not create additional ones here.